Hop Into Easter Fun: Creative Crafts and Activities for Your Learning Centre!
Easter is a time of joy, creativity, and excitement, making it the perfect opportunity to introduce some fresh, fun, and hands-on activities to your learning environment.
As an educator, you can help children engage in activities that spark their imagination, encourage learning, and celebrate the season in a meaningful way. From interactive crafts to energetic games, these unique Easter ideas will bring a smile to every child’s face while promoting development and social interaction. If you’re looking for something beyond the usual Easter egg decorating, these activities and crafts will inspire you to add a new twist to your Easter celebrations!
Hoppy Bunny Paper Plate Puppets
Let’s start with something adorable and interactive! These paper plate bunny puppets are simple to make and perfect for creating imaginative play. This activity not only gets children involved in some Easter craft, it also allows for imaginative role-play as they interact with their new bunny pals.
What you will need: Paper plates, white and pink paper, markers or pencils, glue, googly eyes and craft sticks.
Instructions:
- Prepare the Bunny Ears: Cut two bunny ears from the white paper. Cut smaller ear-shapes from the pink paper (for the inside of the ear). Glue the pink ears onto the white ears.
- Create the Bunny Face: Draw a small pink nose, whiskers, and a mouth on the centre of the paper plate. (Alternatively, you can use buttons of the nose & pipe cleaners for the whiskers. You can also cut out these shapes from construction paper if you prefer.)
- Attach the Eyes: Glue googly eyes to the plate to make the bunny’s face come to life. Draw eye lashes for an even more gorgeous bunny!
- Add the Ears: Glue the bunny ears to the top of the paper plate. Position them slightly tilted to create a fun look.
- Attach the Craft Stick: To make the puppet interactive, glue a craft stick to the bottom of the plate. This way, the children can hold their bunny puppet and start playing!
- Optional Decoration: If you like, let the children add extra decorations like a pom-pom for the bunny’s tail or glitter to make it sparkle.
Eggcellent Sensory Bottles
Sensory activities are fantastic for toddlers and young children as they stimulate the senses and help them focus. These Easter-themed sensory bottles are easy to make and can be used to explore colours, textures, and sounds.
What you will need: Clear plastic bottles (preferably small size), glitter or sequins, water, food colouring (optional), small plastic Easter-themed items such as mini eggs, bunnies etc and of course some superglue to secure the lids.
Instructions:
- Prepare the Bottle: Fill the plastic bottle to halfway with water.
- Add Glitter or Sequins: Drop some glitter or sequins into the bottle. This will give it a magical, swirling effect when shaken.
- Add Colour (optional): For an extra burst of colour, add a few drops of food colouring to the water.
- Insert Small Easter Items: Drop in small Easter-themed items such as mini plastic eggs, bunnies, or other tiny decorations. These will float and create a fun surprise when the bottle is shaken.
- Seal the Lid: Once you’ve filled the bottle, securely glue the lid onto the bottle using superglue to prevent spills.
- Shake and Explore: Once the bottle is sealed, let the children shake the bottle and watch the glitter, water, and mini Easter items swirl together. This sensory bottle can also be used during circle time for calming moments.
Nature-Inspired Easter Baskets
Let’s connect with nature this Easter! Instead of using traditional baskets, why not try making Easter baskets out of natural materials? Not only is this a fun & meaningful craft activity, it is also a great way to teach children about nature and encourages them to appreciate the beauty of the environment around them. These baskets can be used to carry Easter eggs, or they can be gifted to parents as a memorable keepsake!
What you will need: Sticks or branches, string, flowers (artificial if you don’t have access to real flowers in the garden around you), glue & scissors.
Instructions:
- Gather Your Materials: Take the children on a nature walk to collect some flexible sticks & small branches. These will form the frame of the basket.
- Create the Base: Form a circular shape with the sticks to create the base of the basket. Secure the ends of the sticks together with glue to hold them in place. You may need extra sticks to reinforce the circle and make it more sturdy.
- Build the Sides: Begin attaching vertical sticks around the perimeter of the base. These will form the walls of your basket. Use glue to secure each stick along the edges of the circle.
- Add the Handle: Once the sides are complete, take a pieces of string and tie to one of the sticks on one side of the basket. Then tie the other end of the string to a stick on the other size to create the handle of the basket. Alternatively, you can find a flexible stick and bend it into a curved shape for the basket handle. Secure each end of the handle to opposite sides of the basket with glue.
- Decorate the Basket: Let the children decorate their baskets with flowers or petals. You can also use ribbon or colourful twine for additional decoration.
- Finish the Basket: Optional – Line the inside with fabric or shredded paper for extra cushioning for Easter eggs or treats.
Easter Egg Shakers
Put a twist on the classic Easter egg by turning them into musical instruments! These Easter egg shakers are an excellent way to incorporate music and movement into your classroom celebrations. You could even turn it into a fun dance party with children shaking to the beat!
What you will need: Plastic Easter eggs, rice or pasta (for filling), tape/glue, markers and stickers.
Instructions:
- Prepare the Egg Shells: Open the plastic Easter eggs and separate them into two halves.
- Fill the Eggs: Place a small amount of rice or pasta into one half of the egg.
- Seal the Egg: Close the two halves of the egg together and secure using tape or preferably glue the egg shut so it doesn’t open during play.
- Decorate the Shakers: Let the children decorate the eggs with markers, stickers, other craft pieces. Encourage them to be creative with their designs.
- Shake to the Beat: Once the eggs are decorated and dry, encourage the children to shake their eggs in time to music or as part of a fun Easter rhythm game.
Flower Power Easter Cards
This craft idea not only celebrates Easter but also the arrival of spring! Handprint flowers are a heartwarming and simple craft that will make the perfect Easter cards for parents.
What you will need: Construction paper in different colours, paint, markers, glitter and glue.
Instructions:
- Paint the Handprint Flowers: Have the children paint their hand with a bright colour (such as pink or yellow) and press it onto a sheet of construction paper to create the ‘flower’ shape.
- Add Stems and Leaves: After the handprint dries, use markers to draw a stem and leaves coming from the handprint to complete the flower design.
- Decorate the Card: Children can add extra details like glitter, hearts, or other craft resources to make their card their own.
- Write a Message: Once everything is dry, help the children write a short Easter message or their name inside the card.
- Gift the Card: These handprint flowers make beautiful keepsake cards for parents or caregivers!
DIY Easter Bunny Headbands
This is a simple, crafty way for children to show off their Easter spirit! These adorable bunny headbands are easy to create and can be worn during the Easter festivities.
What you will need: Construction paper (pink, white, black), scissors, glue and string.
Instructions:
- Create the Bunny Ears: Cut out two large bunny ears from white construction paper, and smaller pink ear shapes for the inside part of the ear. Glue the pink shapes inside the white ears.
- Make the Headband: Cut a strip of construction paper long enough to fit around a child’s head. This will be the base of the headband.
- Attach the Ears: Glue the ears to the top of the headband. Make sure they’re secure enough to stay upright.
- Add the Band: Glue the ends of the headband together to fit around the child’s head, or attach some string to make it adjustable.
- Optional Decoration: You can also add a face or some bunny whiskers with markers, or embellish the ears with glitter or stickers!
Easter Bunny Hop Relay Race
Celebrate Easter outdoors with an Easter-themed relay. This active game is a fun way to burn off some energy while celebrating Easter. It also helps children develop gross motor skills!
What you will need: Open space, bunny ear headbands (above) and cones or markers for the course.
Instructions:
- Set Up the Course: Use cones or markers to create a relay race path. You can make it simple or add more challenges along the way.
- Prepare the Children: Give the children bunny ear headbands to make them feel like real bunnies (details above).
- Start the Race: The children will hop like bunnies from one end of the course to the other, hopping over cones or markers as they go.
- Tag Team: After reaching the finish line, they can tag the next child in line to continue the race. You can make it competitive or just a fun activity.
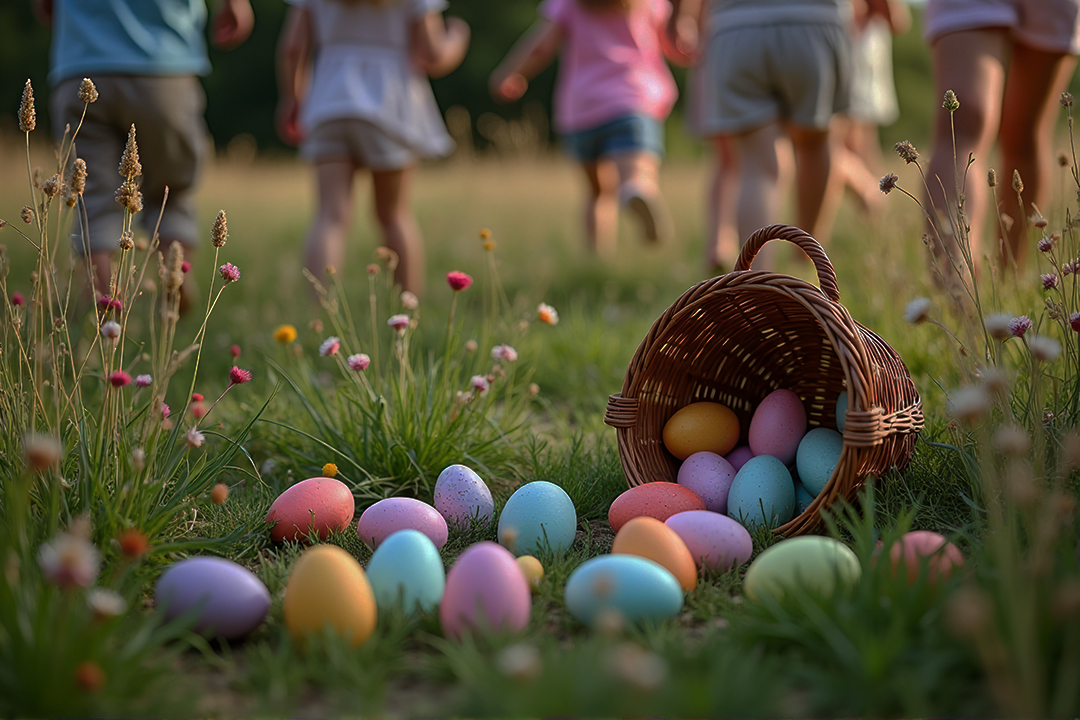
DIY Easter Egg Hunt with a Twist
Why settle for a traditional Easter egg hunt when you can create one that’s educational and fun? This version of an Easter Egg Hunt challenges children to match colours or shapes as they search for eggs.
What you will need: Coloured Easter eggs (plastic or chocolate to make it even more delightful), colourful card/paper (to match the eggs), small baskets (or create your own Nature-Inspired Basket from above) for collecting eggs.
Instructions:
- Prepare the Colour Cards: Cut large pieces of card/paper to represent each colour of the eggs. For example, if you have red, blue, yellow, and green eggs, prepare a red card, a blue card, a yellow card, and a green card. Place the cards around the search area (indoors or outdoors) to act as “colour stations.”
- Hide the Eggs: Scatter the coloured eggs around the area. Make sure there are enough eggs of each colour for all the children to find.
- Explain the Hunt: Tell the children that they are going to go on a hunt to find eggs, but first, they need to match each egg to the correct colour station. For example, when they find a red egg, they need to bring it to the red colour card etc.
- Start the Hunt: Let the children start searching for the eggs! As they find an egg, they will bring it to the corresponding “colour station”. This will help them associate the colour of the egg with the colour they see on the card.
- Celebrate: Once all the eggs have been found and matched to the correct colour stations, gather the children to celebrate their colour-matching skills. If using real Easter eggs, allow the children (and yourselves) to enjoy the delicious treat!
Make Easter this year one they will never forget!
Easter is the perfect time to unleash creativity, spark joy, and celebrate in the most fun-filled way! With these fresh craft ideas and thrilling activities, you’re giving children the chance to dive into imaginative play, build essential skills, and have an absolute ball! From creating adorable bunny puppets and embarking on an egg hunt with a colourful twist, to hopping into action with a bunny race, these activities will make your Easter celebration truly unforgettable!
So grab your supplies, get ready to craft, play, and learn, and watch your classroom burst with Easter magic! 🐰🧺🐣🥕
Tags: learning activities, play-based learning, transition to school


